How To Build a Headless WordPress Site With React + WPGraphQL
This tutorial will cover how to use React and WPGraphQL to build a straightforward Headless WordPress site. This guide assumes prior knowledge and understanding of WordPress, JavaScript, React, and GraphQL.

What You’ll Need
You’ll require software running on the server to take requests, process them, and then send back a response to use GraphQL. Most widely used server-side languages (PHP, Node, Python, etc.) include server implementations.
To run queries for blog posts, pages, taxonomies, settings, users, and many other WordPress-related things (referred to as “types” in GraphQL parlance), we’ll be using the WPGraphQL plugin on the server. This plugin takes two existing PHP libraries for GraphQL (graphql-php & graphql-relay-php) then layers WordPress-specific functionality on top of them.
You’ll also need a client-side library to assist with making requests to the server and receiving the results that it returns once the server has GraphQL support. Apollo Client will be used for our client-side application.
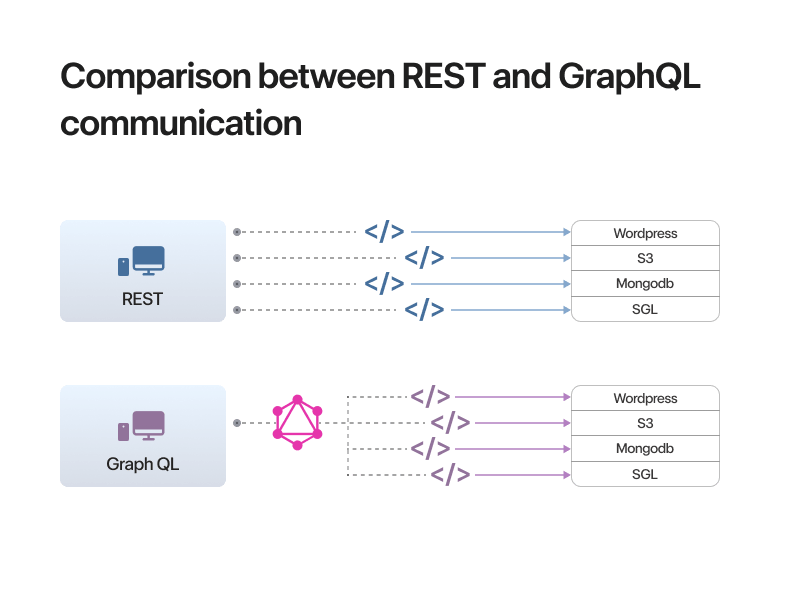
Single-page application (SPA) with React consuming WordPress data with GraphQL

WordPress is, without a doubt, the internet’s most popular CMS platform, powering 43% of all websites on the internet. However, this method of building a website might not be the preferred one from the developer’s point of view.
On the other hand, things are a bit different from a website owner’s perspective. WordPress has an intuitive content management system, is quick to set up, and most authors and editors are already familiar.
Headless WordPress is a middle ground: giving developers freedom and flexibility while maintaining the familiarity of WordPress for content creators.
This tutorial will outline one method for developing a simple Headless WordPress site. We’ll cover the steps for building a Single Page Application that uses WordPress data and relies on modern tools like React, GraphQL, and Webpack.
What is WPGraphQL?
GraphQL is an open-source query language for APIs that was developed by Facebook developers in 2012 and released to the public in 2015. WPGraphQL is a free WordPress plugin that lets WordPress developers use GraphQL to connect WordPress with modern front-end stacks

Making a React Single Page Application
A few issues exist before developing a new display layer for a WordPress website, including the data access layer, routing (it would be fantastic to have a structure similar to WordPress URLs), and single-page navigation for pages, child pages, and posts. Let’s go over each one in turn.
GraphQL data access layer
Although a front-end application could obtain data from a GraphQL server using a standard HTTP request, it is strongly advised not to do so due to its ongoing difficulties. In general, any application requires integration with the front-end framework, the use of caches to speed up operations, the ability to paginate vast amounts of data, etc.
Apollo Client, a GraphQL client, is helpful in this situation. Even though WPGraphQL is implemented following the Relay spec in the back-end, I chose Apollo over Relay for the following reasons:
- Incredibly simple to set up
- Independent of front-end framework
- Adaptable to any GraphQL schema and flexible
The code below shows how simple it is to set up Apollo Client to begin querying the GraphQL server.
import React from 'react';
import ReactDOM from 'react-dom';
import { BrowserRouter } from 'react-router-dom';
import { ApolloProvider } from 'react-apollo';
import { ApolloClient } from 'apollo-client';
import { HttpLink } from 'apollo-link-http';
import { InMemoryCache } from 'apollo-cache-inmemory';

const client = new ApolloClient({
  link: new HttpLink({ uri: 'http://localhost:5010/graphql' }),
  cache: new InMemoryCache()
});

ReactDOM.render(
  <ApolloProvider client={client}>
	<BrowserRouter>
  	<App/>
	</BrowserRouter>
  </ApolloProvider>,
  document.getElementById('root')
);
import React from 'react';
import { Link, withRouter } from 'react-router-dom';
import { graphql } from 'react-apollo';
import gql from 'graphql-tag';

const Nav = (props) => {

  const { loading, pages } = props.data;

  if (loading) {
	return (
  	<div>Loading...</div>
	);
  }

  if (pages.items) {
	return (
  	<nav>
    	{ pages.items.map(item => {
      	return (
        	<Link key={item.page.slug}
              	to={`/${item.page.slug}`}
                  className={(props.location.pathname == `/${item.page.slug}`) ? 'active' : '' }>
          	{item.page.title}
        	</Link>
      	);
    	}) }
  	</nav>
	);
  }

  return (<div>No pages</div>);

};

export default graphql(gql`
  query GetFirstLevelPages {
	pages(first: 20, where: {
  	orderby: {
    	field: DATE,
    	order: ASC
  	}
	}) {
  	items: edges {
    	page: node {
      	title
      	slug
    	}
  	}
	}
  }
`)(withRouter(Nav));
import React, { Component } from 'react';
import { Redirect } from 'react-router-dom';
import { graphql } from 'react-apollo';
import gql from 'graphql-tag';
import { sanitize } from '../commons/HtmlSanitizer';

class Page extends Component {

  render() {
	const props = this.props;

	return (
  	<div className="page">
    	<h1>{(props.data.page) ? props.data.page.title : '-'}</h1>
    	<div id="page-content" className="content" dangerouslySetInnerHTML={{
      	__html: (props.data.page) ? sanitize(props.data.page.content) : ''
    	}}></div>
  	</div>
	);
  }

  componentDidUpdate() {
	let pageContent = document.getElementById('page-content');
	let links = Array.from(pageContent.querySelectorAll('a'));
	links.map( (node) => node.onclick = this.onLinkClicked.bind(this) );
  }

  onLinkClicked(event) {
	event.preventDefault();
	this.props.history.push(event.currentTarget.pathname);
  }
}

const GetPageBySlug = gql`
  query GetPageBySlug($slug: String) {
	page: pageBy(uri: $slug) {
  	id
  	title
  	slug
  	date
  	content
	}
  }`;

export default graphql(GetPageBySlug, {
  options: (props) => {
	let { slug, parent } = props.match.params;

	// In case we're dealing with a child page, the slug should contain the parent page too.
	if (parent) {
  	slug = `${parent}/${slug}`
	}

	return {
  	variables: {
    	slug
	  }
	}
  }
})(Page);
The HTML pages will be retrieved from the GraphQL server and injected into the React Page component because the main goal is to reuse all WordPress data. This is shown in lines 15 – 17:
<div id="page-content" className="content" dangerouslySetInnerHTML={{
      	__html: (props.data.page) ? sanitize(props.data.page.content) : ''
    	}}></div>
  	</div>
Given that the data in this instance was downloaded from the server as raw HTML, it’s probable that some links (or anchor elements) were also included in the markup.
Regular anchor elements will exit the React app when clicked. So, these links must have a handler aware of the react router and navigate the page using this library to guarantee a single-page experience. The componentDidUpdate() React life-cycle method is used in line 22 to gather all anchor elements and override the click functionality.
componentDidUpdate() {
	let pageContent = document.getElementById('page-content');
	let links = Array.from(pageContent.querySelectorAll('a'));
	links.map( (node) => node.onclick = this.onLinkClicked.bind(this) );
  }
Conclusion
Et voilà, your very own Headless WordPress site! I hope you found this tutorial useful and that you’ll enjoy your future adventures with Headless WordPress.
Book a 30-min Introduction Call
Let's jump on a quick intro call We'll break down your project, and pinpoint exactly how we can help.


Our clients  Holaa! love working with us see their stories below!


